

QuickTips: Tips & Tricks For Bookkeeping Success
QuickBooks® puts a range of powerful business data at your fingertips. Not only does this program give you the ability to pull really valuable reports that can help you streamline your business’s finances, it gives you the ability to customize those reports to meet your specific needs. Read on to find out how you can get more from your QuickBooks® software and then discover how you can back up your company file to ensure that your financial data remains current and always available. Below you will find step-by-step tips that will help you:
- Back up your company file
- Pull financial reports
- Customize your reports
- Ensure you will continue to have access to live support
And don’t forget to sign up for our QuickTips newsletter to get helpful QuickBooks® information delivered to your inbox every month!
QuickTip 1: Backup Your Company File Regularly In QuickBooks® Desktop
Backing up your company file regularly is critical. After all, you never know when the unthinkable will happen! Here’s how to do it:
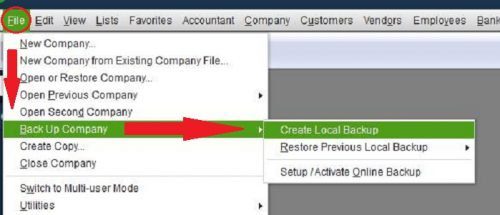
- Go to File > Back Up Company > Create Local Backup
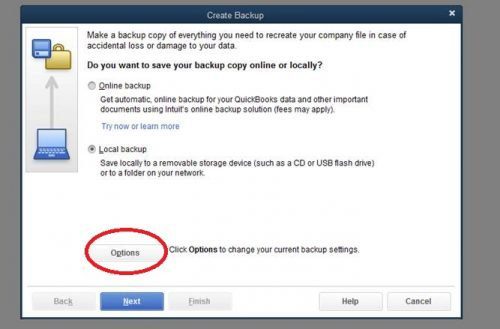
- Once there, click the “Options” button
- Click “Browse” to select the location where you would like to save the backup copy
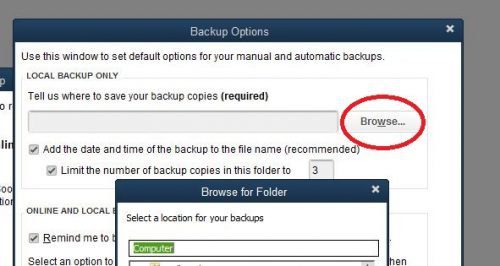
- Finally, click “Next” “Save Now” and “Finish”
QuickTip 2: Customize Your Reports In QuickBooks®
Mastering the Reports function in QuickBooks® is essential. After all, you need the data compiled in these reports to make better business decisions capable of propelling your business forward. But you don’t have to be content with the types of reports you get right out of the box. You can customize these reports for even greater knowledge and control over your company’s finances and have the system memorize them for use later!
Customization can occur in both the QuickBooks® desktop version as well as online. Step-by-step instructions for both platforms are outlined below.
QuickBooks® Desktop
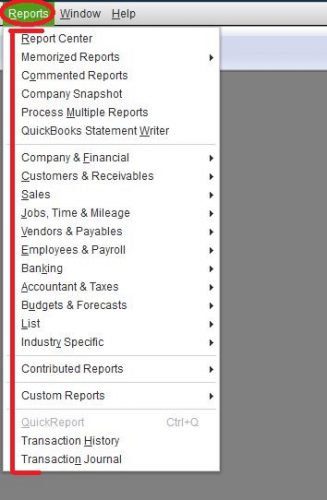
- First, you need to choose the report you would like to customize. On the desktop version of QuickBooks®, the list of reports you can choose from can be found, easily enough, under the “Reports” tab.
2. For this example, I’m going to customize the Balance Sheet report. Once your screen pops up, you’ll see that you have the ability to modify the report in several different ways. This is where you will make customized changes to your report. 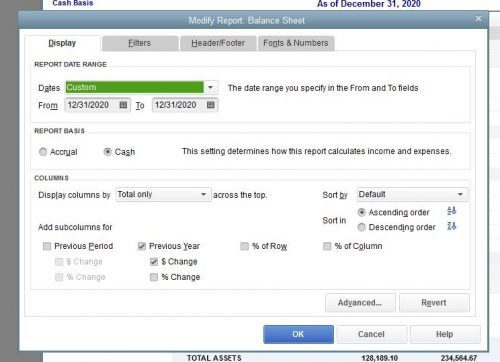
3. When you are done making all the modifications you want, click on the “Memorize” button to save your changes.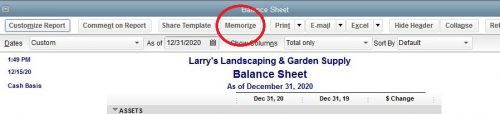
4. Before you quit, you are going to need to change the name of the report, which will make it easy for you to refer to later.
5. Once you’ve changed the name, click “OK.” That’s it, you’re done!
6. Then, to view the report, go to Reports > Memorized Reports. From there, you will need to look for the name of the report you just created. 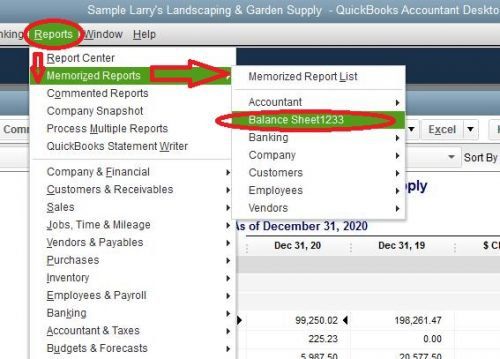
Now you can utilize this brand, new report whenever you like!
QuickBooks® Online
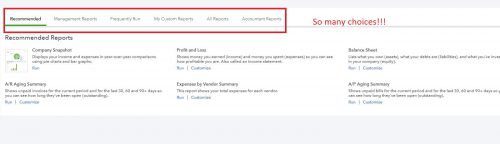
- First you will need to choose which report you want to customize. To do this, you will need to click on “Reports.”
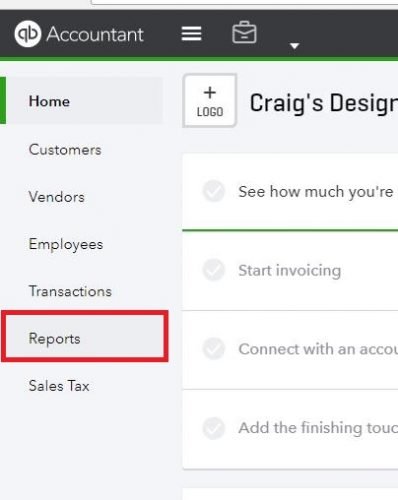
- Clicking on “Reports” will open up a new navigation panel that gives you access to a variety of different reports. To find the one you want to work with, search through the sections and look through your options.
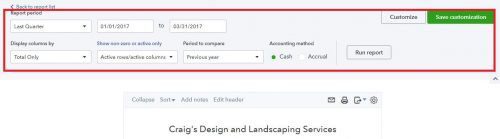
- In this example, I’m going to customize a profit and loss report. When you open this report, you will see all the customization options available.
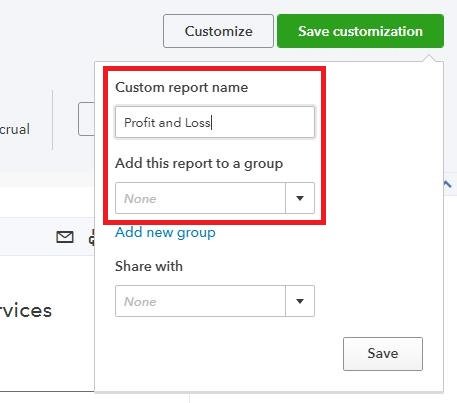
- Once you customize the form, you will need to click on the “Save Customization” button in the top, right corner of the window to save your changes.

- Clicking on “Save Customization” will give you some other options, which will allow you to save your new report. You’ll need to give it a name and add it to a group.
- Clicking “Save” will complete the process.
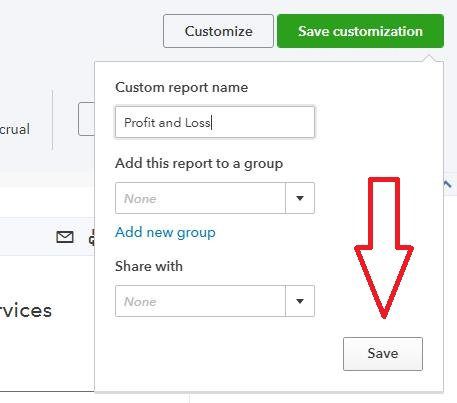
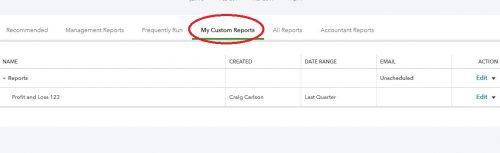
- To pull the report back up, all you will have to do is go to Reports > My Custom Reports. Then select the report you want to use!
By Matt Long (Wooster office)