

QuickTips: Tips & Tricks For Bookkeeping Success
Happy May All! This is one of my favorite times of the year and the fact that it’s my birthday month might have a little something to do with it. This year, for my birthday, instead of gifts for me, I thought I would share with you my ultimate favorite features of QuickBooks®.
As an always-on-the-go business owner, I understand that managing our company’s cash flow is vital, which is why last month, my QuickBooks Business Success series had us zeroing in on the cash management tools found in QuickBooks. I love these tools because, with only a few clicks, I can easily catch a glimpse of what cash I have coming in what cash needs to go out each week.
I like to know where the business stands at all times from a financial perspective, and having this information at my fingertips puts our business in a better position to be able to handle any curveballs that are thrown our way. The most important step is simply taking the time to properly enter our business’s bills and set up vendors. This easy task will ultimately make quick work of handling your accounts payable.
Listen: The Value Of Good Bookkeeping For Business Owners
QuickTip: Properly Add Vendors To QuickBooks
Having a pile of bills lying around will not give you the answers (not to mention the mindset) to handle everything that’s thrown your way. Instead, by taking full advantage of QuickBooks, I can proactively tackle each day with confidence while easily navigating any curveballs that would otherwise put us into crisis mode. Moreover, this knowledge empowers me to think about the business from an even broader, more strategic perspective.
In short, if you’re not already using the bill pay/accounts payable features in QuickBooks, I highly encourage you to give them a try.
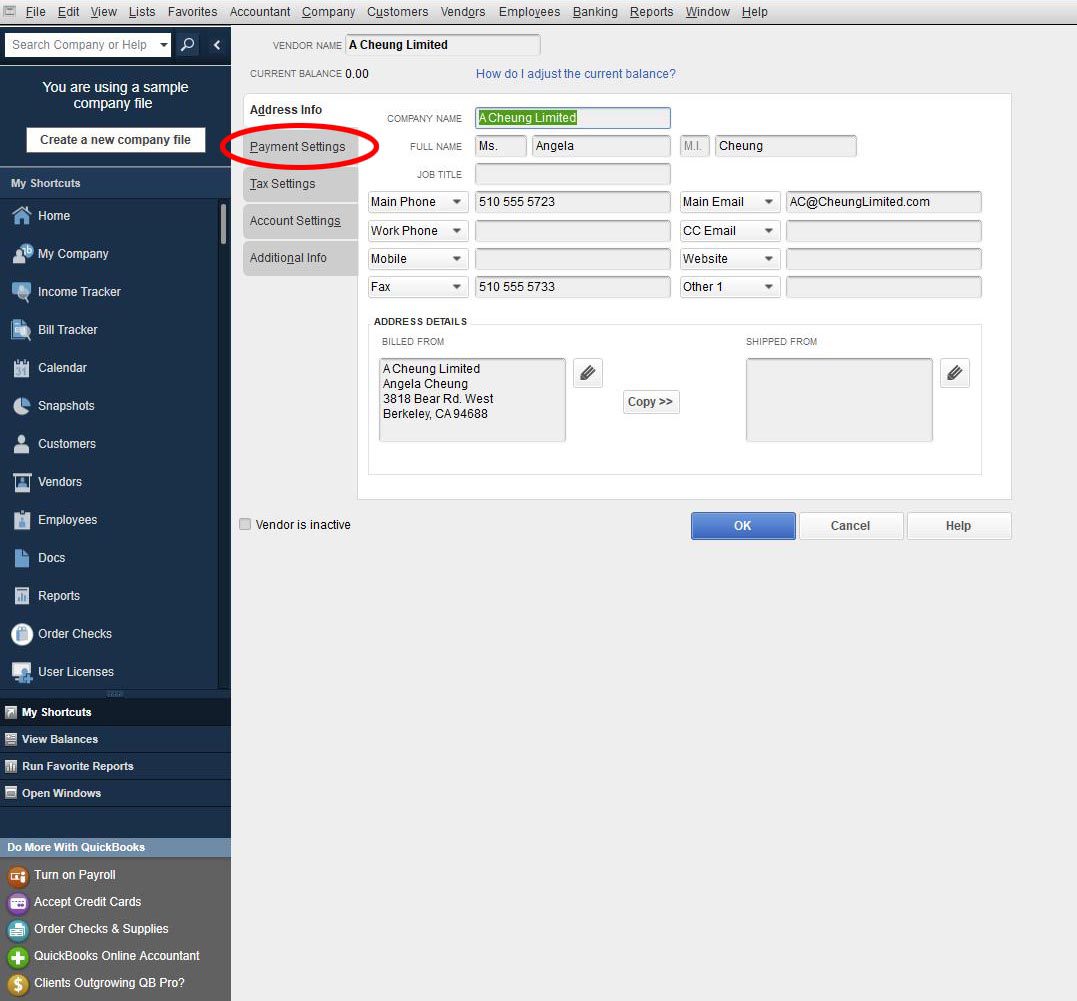
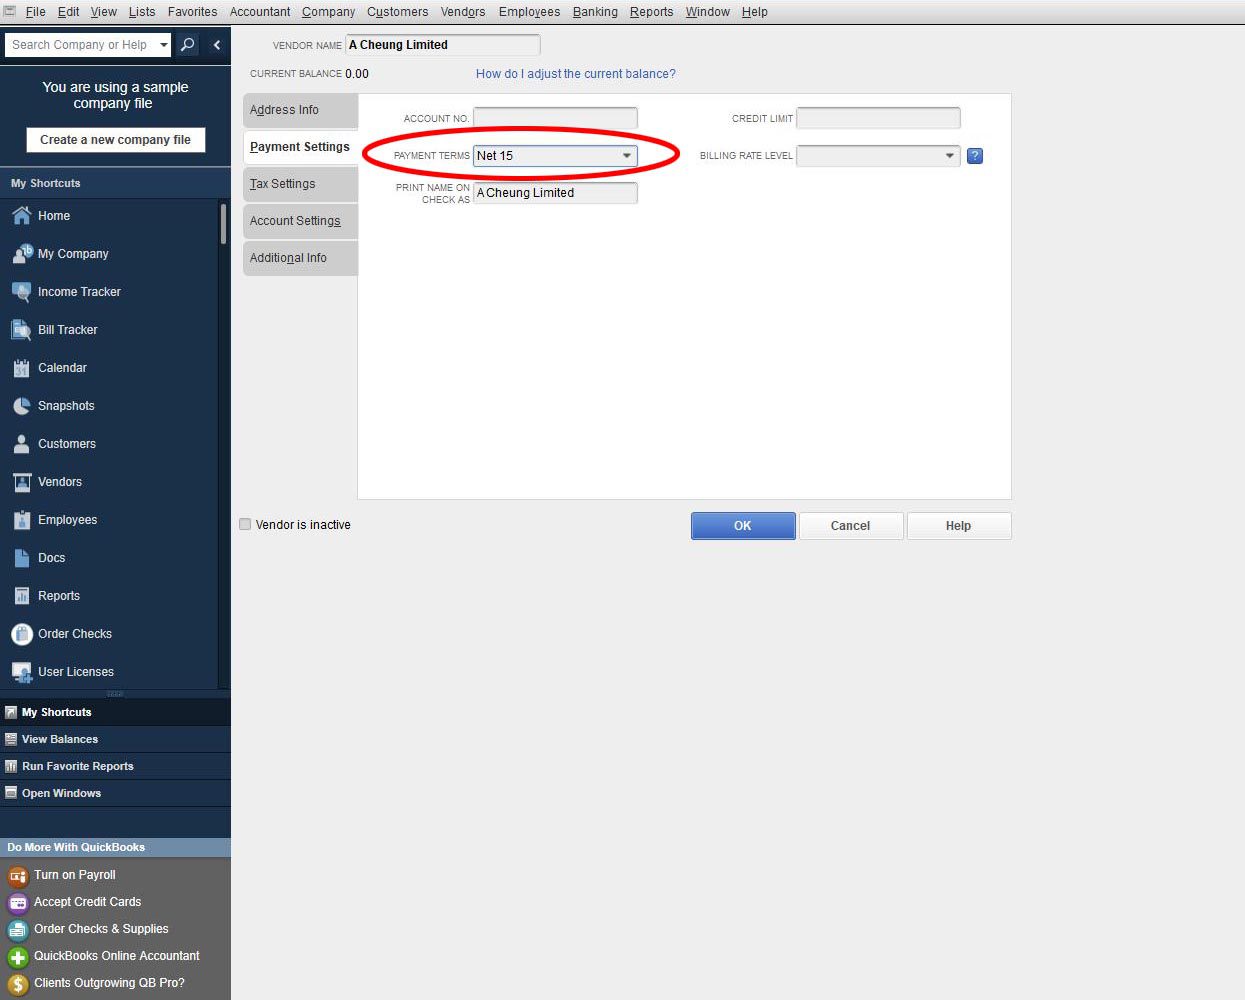
Step 1 – Proper Vendor Setup
The key to easily managing your accounts payable is to set up the payment terms properly. You can set up your payment terms under the payment settings tab of the vendor setup option. Remember, and I can’t stress this enough, QuickBooks is only as good as the information you put in.
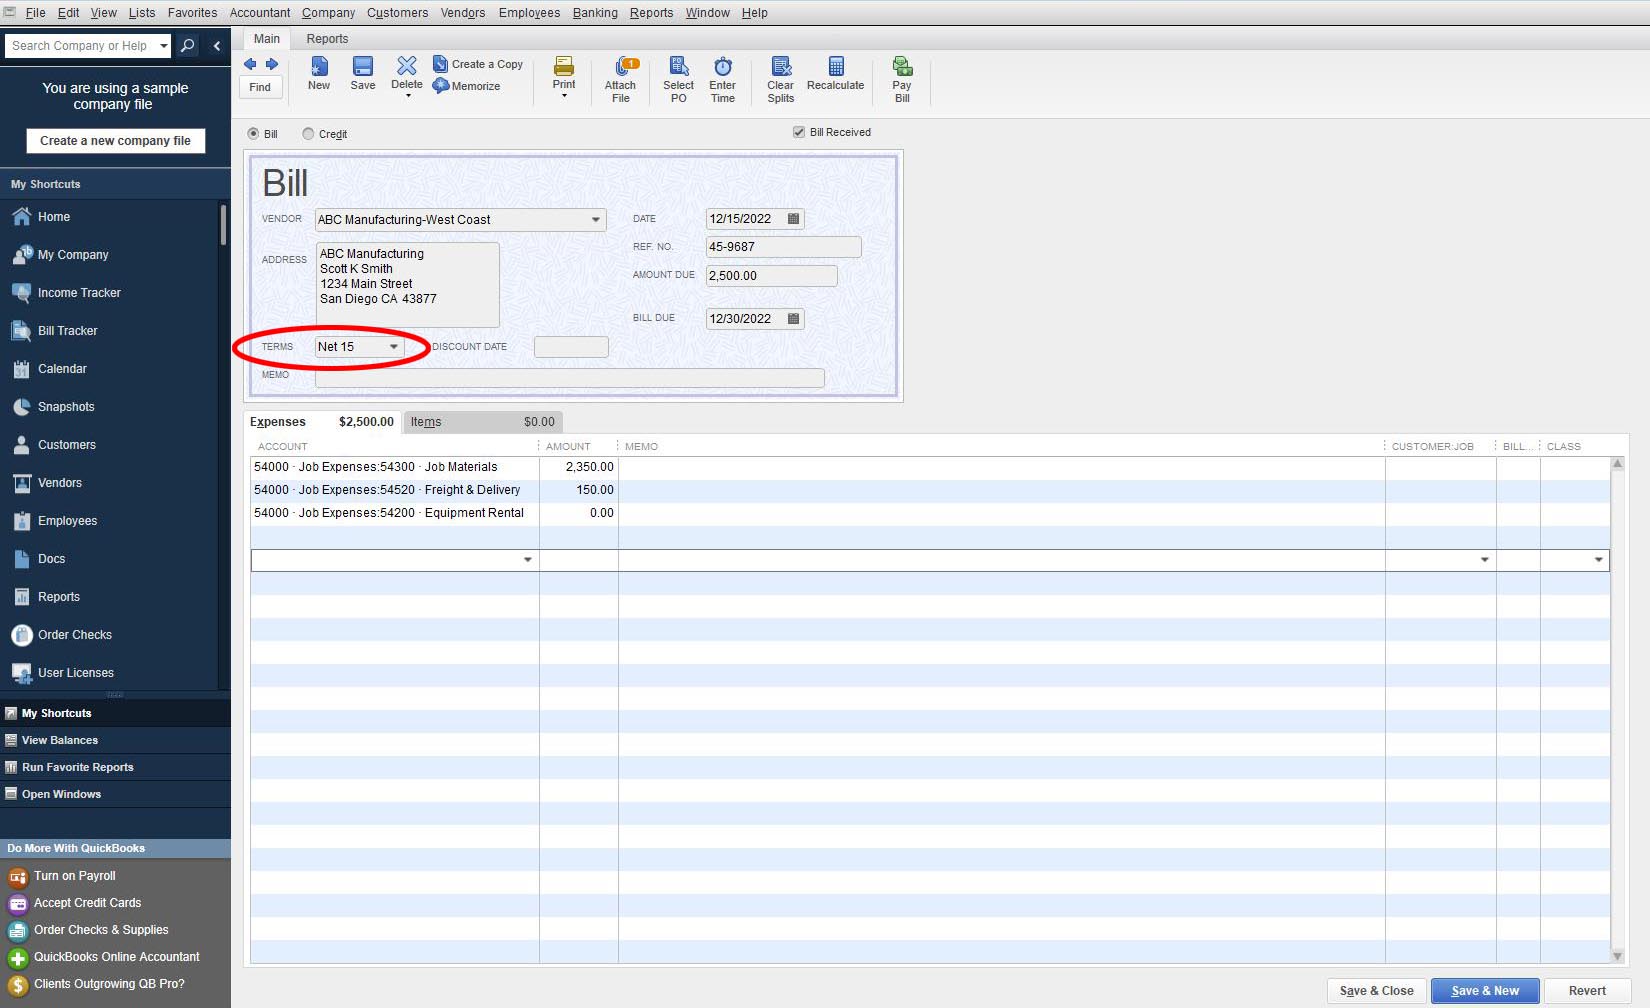
Step 2 – Enter The Bill
In this step, you’ll need to remember to keep the terms of the bill payment and the bill’s due date in mind when inputting your information.
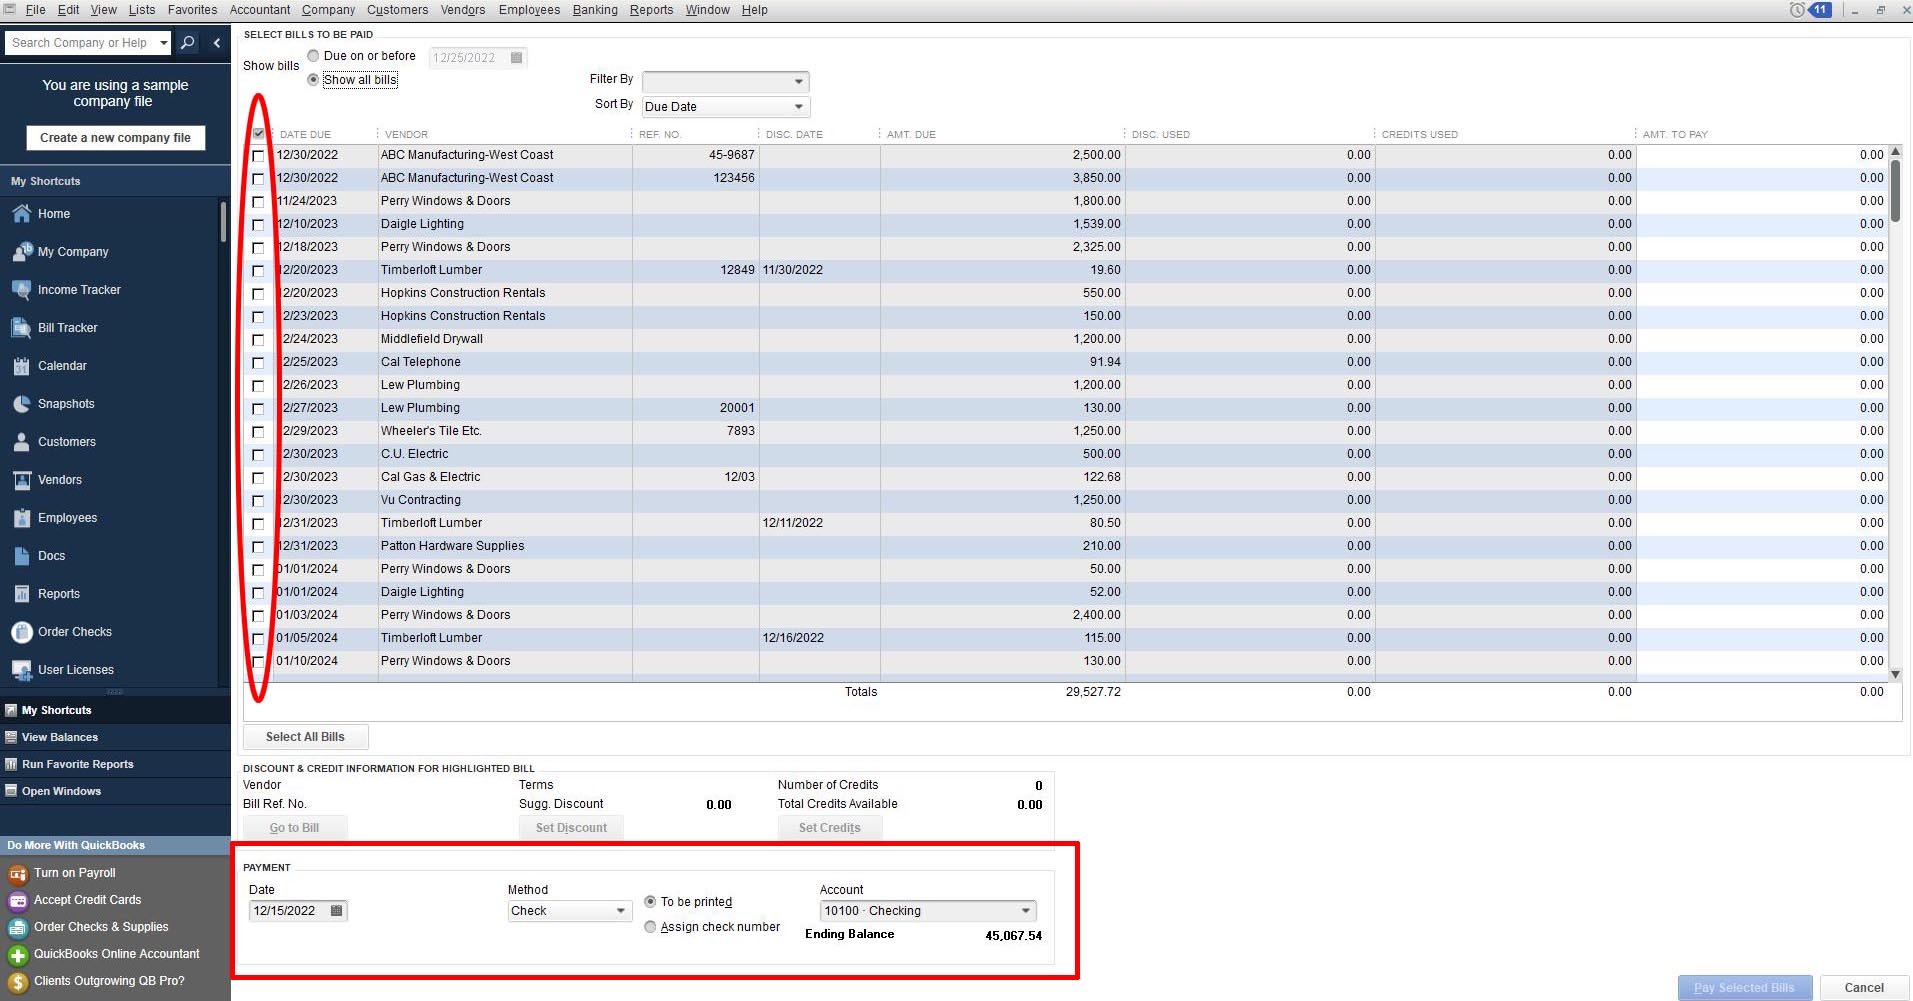
Step 3 – Pay Your Bills
This is easily my favorite screen. By correctly entering the terms associated with your vendors, you can easily pay the bills you owe. I typically pay our business’s bills every week to proactively manage our cash flow. AND, I only pay bills when they are due.
What’s really neat, is that when you pay your bills, you can monitor how your cash is affected by watching the bank balance at the bottom of your screen.
Step 4 – Print Your Checks
Click on which bills you are paying and then, at the bottom of the page, choose the “To be printed” option. Easy as pie …
By Matt Long (Wooster office)